Garrattfan's Modelrailroading Pages
AD60
3.2 Detailing the rear unit
|
Instructions [171]-[214], page 19-21 of the rewritten instruction manual
Detailing the rear bunker is in most respects very much the same as detailing the front unit water tank, so I won't elaborate on it. Only where the rear bunker has some peculiarities I will note that |
|
All detail parts laid out. This picture shows all detail parts except for the handrails and knobs, neatly arranged for the right hand side (top row) and the left hand side (bottom row). |
|
 |
Another way of holding the rear unit while working on it is simply clamping the mounting screw. |
 |
I couldn't resist making another shot of the handrail knobs for the mere joy of it. Its a miracle how small these tiny turned parts are. The drill is 0.5 mm! |
 |
Contrary to the front unit the handrail knobs turn out to have a problem on the rear unit. Their lugs are simply too long and protrude through the brass sheet ... |
 |
So I snipped off the excess end and shortened the knob to about 0.5 mm. This still gives enough hold to position them correctly. After soldering and cleaning there's no trace of it. |
The handrail being mounted between both end knobs as described with the front unit. Note that all hanging knobs have been shortened as described above |
|
 |
The toolbox was envisioned by DJH in the middle of the bunker deck. But leafing through my books found that on the majority of locos the toolbox was positioned more to the right. |
 |
I made this styrene drill help and placed the toolbox were I wanted it ... |
 |
.. and pre-drilled and later drilled two new locating holes |
 |
placing the toolbox were I wanted it. |
The completed rear bunker |
|
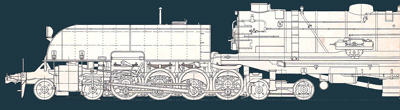
 This is how the loco has progressed so far |
|
 |
|


Sign my
GuestBook